Creating a lens flare in Photoshop will highlight your images with a special starburst or mild bokeh look. Lens flare may add a warm softness to backlit portraits, detect landscape images, and assist you in getting a naturally cinematic or sun-drenched look as well as include more dimension.
What is a Lens Flare
You’ll notice lens flares when you put your camera lens towards a bright source of light. It may be anything from the sun to artificial lighting. They frequently appear as concentric circles of light in your picture. Nevertheless, they may also look like diamonds, stars, or other shapes based on the lens type you have.
Add a Lens Flare in Adobe Photoshop: 6-Steps Tutorial
With Photoshop you will be able to generate lens flare just by taking some simple and comprehensible. Any craft is needed if you want to include photoshop lens flare in your picture.
In this Photoshop tutorial, I’ll demonstrate how to insert a lens flare to an image by selecting a new layer and applying blending tools.
1. Open Your Image

To get a natural-looking lens flare, choose the right photo that can have it in reality. You have to see the light source in the original. It can be the sunlight, studio lights, or car headlight.
If you’ve ever taken a picture towards the sun, you know that at times you can see a lens flare appearing naturally. Sure, it does not appear in the frame whenever you wish.
2. Create a New Layer

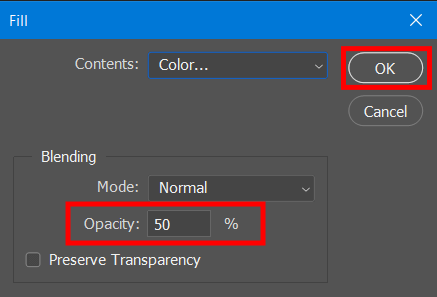
Generate a new layer. Then, go to the menu board and choose “Fill” from the list of items and tap on 50% gray button.
3. Set the Blending Mode

Customize the blending mode to Overlay.
4. Go to Filter

Press Filter ? Render ? Lens flare. Pick which lens flare kind you are willing to use.
You will see a dialogue box presenting lens flare on a canvas with a range of variants. Select your desired variant and press Ok. Lens flare will immediately appear on your photo.
You may also use other filters to the lens flare to improve it. For instance, apply Blur or Sharpen.
5. Position Your Lens Flare

You will see a new window open up where you can opt for various lens flare looks.
Place the lens flare somewhere in the light source that’s visible in your image. Then press OK.
6. Adjust the Brightness

Tap on the main picture and select Filter ? Rendering ? Lens Flare. If you are willing intensify the flare, the brightness of the lens flare will instantly grow.
If you see the lens flare as too bright, you may lower the intensity of the lens flare just by decreasing the opacity of the lens flare layer. When you are satisfied with the outcome, click on the “Ok” key.

After that, the lens flare will appear on the picture with equilibrated as you have customized. If you have to make lens flare or another product professionally, address retouchers. The experts will make your pictures appealing.
How to Remove Lens Flares in Photoshop
As indicated before, lens flares can be distracting at times. If your lens flares are just small circles, then everything you need is to apply the Healing Brush instrument. But if greater circles are obstructing your subject, you may need to apply the Clone Stamp instrument.

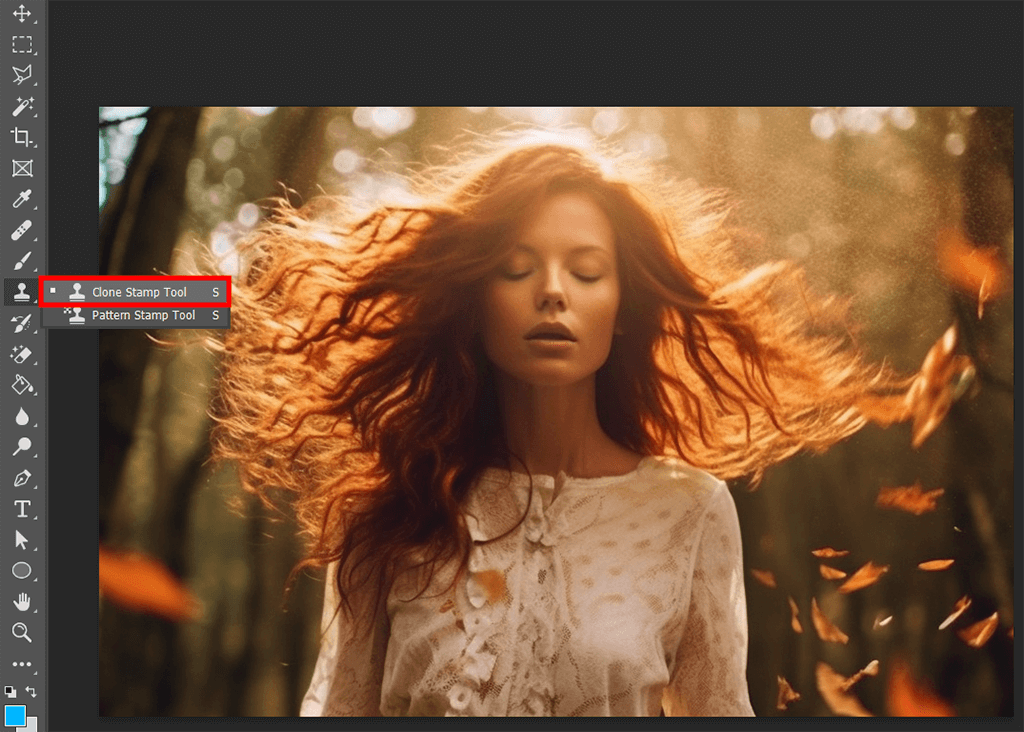
First and foremost, copy the preferred picture and convert it into a new layer. After that, choose the Clone Stamp tool in the instrument board. Click Alt + Left Click (Option + Left Click on Mac) on the surface you are willing to copy and left-click once more to use what you want to copy on the circle you wish to erase.
You have to utilize tiny brush strokes to make everything look natural. Don’t forget to copy areas in the image that closely match the area that the flare is obstructing. If that area is a person’s skin, look for a place to copy that is of the same color and texture. By doing so, you wouldn’t see any blemishes and wrong colors.

Nevertheless, even being careful does not rid you of the bad spots while editing out the flare. If you see blemishes, think about applying the Healing Brush tool to correct them.
