

The process of making a day picture look like night in Photoshop mainly requires navigating the Color Lookup and Curves. Such a day>night shift has been extremely popular since the program was updated with adjustment layers.
By following our Photoshop tutorial, you will understand how to transform a picture taken during the day into a night-time image, and ensure all tones are beautiful and lifelike.
Step 1. Duplicate the Main Layer

Open your picture in Photoshop and duplicate the main layer.
Step 2. Choose the Quick Selection Tool

Head to the tool panel and click on the Quick Selection Tool in the left part of the screen.
Step 3. Select the Sky in the Photo

Make an accurate selection by dragging around the needed area. Use the Alt/Option key and drag to deselect if you included needless pieces.
Step 4. Create a Vector Mask

Once you like the selection, click “Add Layer Mast”. This option is available in the Layers panel.
Step 5. Invert the Mask

If you’ve made a mask in Photoshop and now the sky overlaps with buildings and even hides them, you need to invert the mask.

Go to the Properties panel and choose Invert. To speed up the process, simply click Cmd/Ctrl+I.
Step 6. Drop in the Sky

Place a photo with a sky on your source image. Move this layer below the mask layer.
Step 7. Choose Color Lookup

Make the mask layer active and click “Create or fill new adjustment layer”. Choose Color Lookup.
Step 8. Find Moonlight LUT in the List

Return to the Properties panel and click on the drop-down menu next to the 3DDLUT File. At this point of making day to night Photoshop transformation, we need to apply a LUT.
Select the Moonlight LUT from the available options. Now, your image will look like one snapped at nighttime.
Step 9. Add a Curves Adjustment Layer

Click “Create or fill new adjustment layer” again. This time, you need to choose Curves.
Step 10. Choose Blue Color
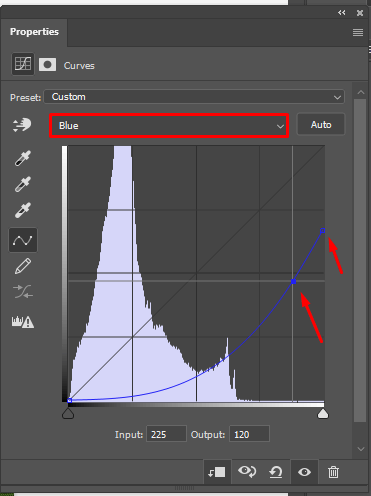
There will appear a drop-down menu. You need to choose blue color there. Add a point by clicking on a photo.
Next, drag down the curve (shown in the sample picture). If you made a mistake, you can always undo and redo in Photoshop.
Step 11. Click on RGB

To customize brightness, you need to click on RGB in the curves. Drag up on the curve to make it slightly brighter (check out the sample to make sure you are doing everything properly).
Step 12. Duplicate the Layer with Mask

To make this action quicker, use Photoshop keyboard shortcuts – Cmd/Ctrl + J.
Step 13. Reorder Layers and Merge Them

Your new layer with a mask should be located between the curves layer (on top) and the LUT layer (below). Anyway, always check how your image looks.
Now merge the duplicate layer with the mask and Color Lookup into a group. Click Cmd/Ctrl+G to group layers in Photoshop or right-click on the picture and choose “Group from layers”.
Step 14. Rename a Folder

Now you have a new group on the panel. You can rename it, for example, to Night.
Step 15. Change the Blend Mode
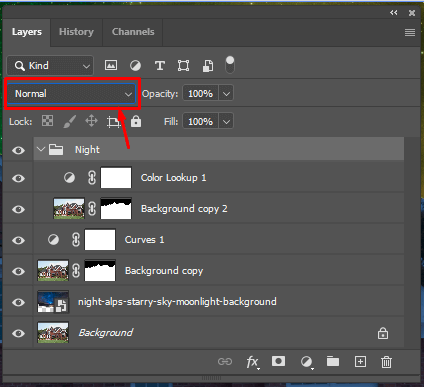
Select the Night Layer Group and move to the upper part of the Layers panel. To blend layers in Photoshop, you need to choose Normal instead of Pass in the Blend mode.
Step 16. Create Clipping Mask

Select the Color lookup layer. Right-click and select Create clipping mask or hold down Alt/Option until there appears an arrow. Click to clip. You will see an icon with a square between the layers > click on it.
Step 17. Create a Layer Mask with a Group

You need to repeat step 4.
Step 18. Add Light to the Photo
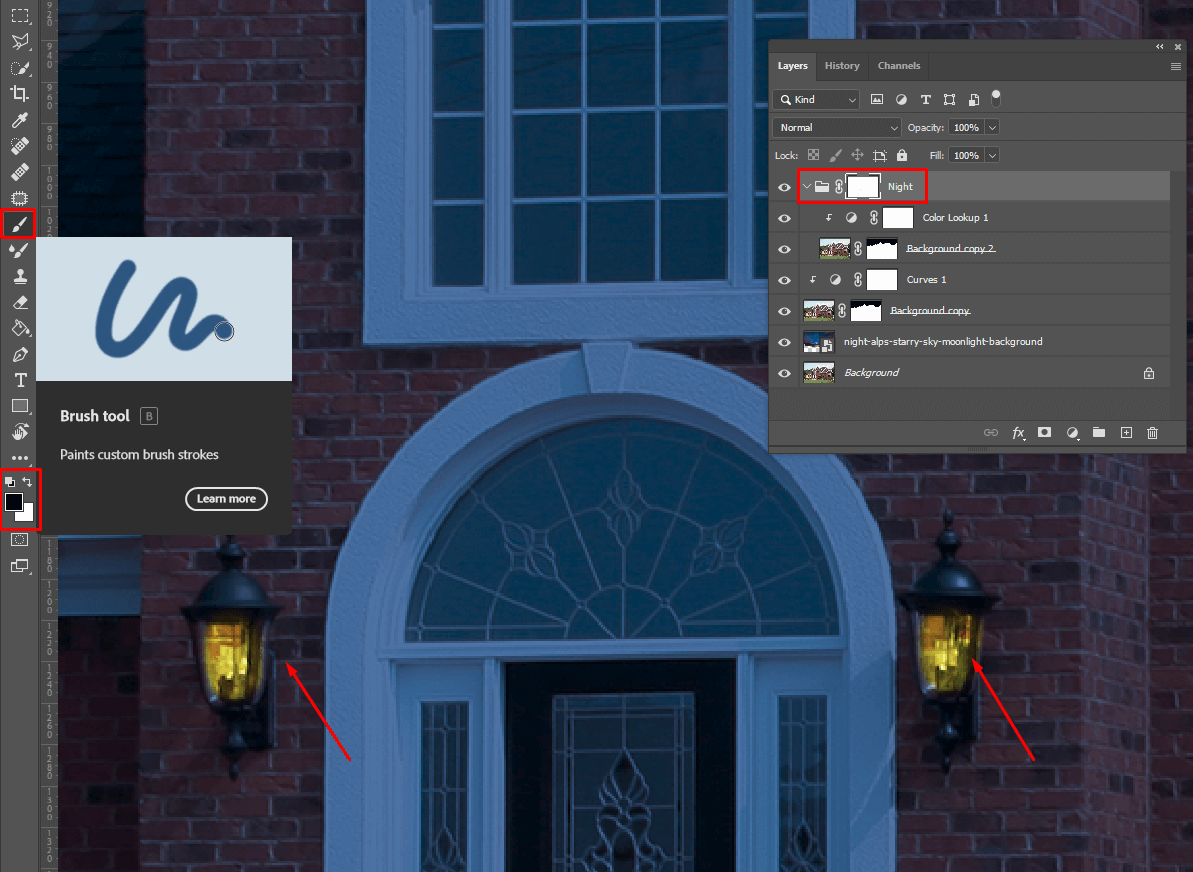
To add glow in Photoshop, it is necessary to activate the Night mask first of all. Next, choose a soft black brush. The opacity should equal 100%. Paint into light sources and windows.

If everything is done properly, you will see your image acquiring a yellowish tint. If you overdo this setting, you can select a white brush and paint the mask away.
Step 19. Make the Light Realistic

Use the same brush but make it bigger (right-bracket key). Lower the opacity to 30%. Add light under windows step by step to achieve a lifelike result.
Step 20. Choose Gaussian Blur
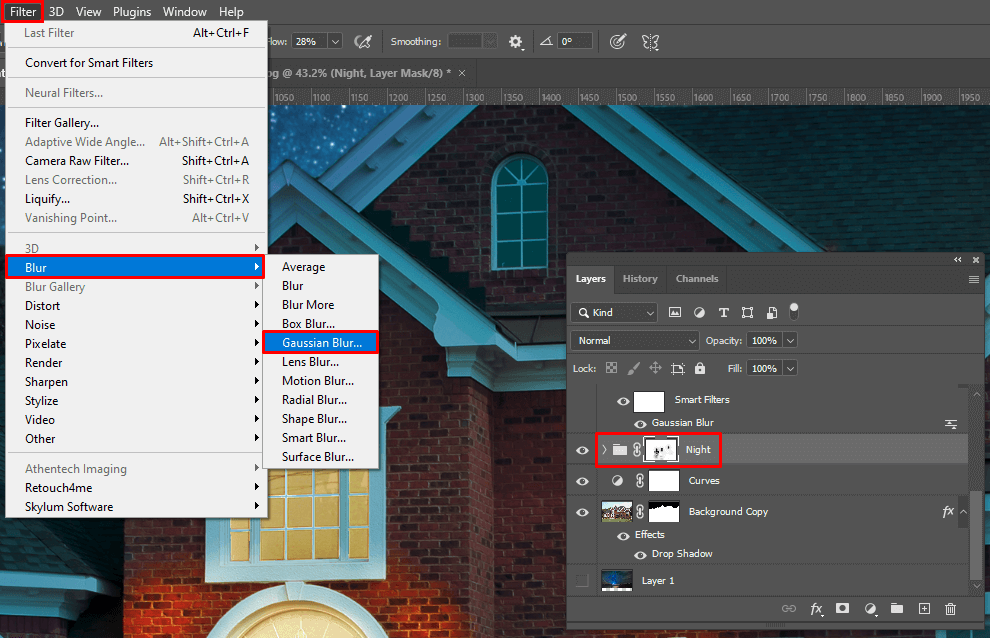
Make sure your mask is selected. Next, choose Filter > Blur > Gaussian Blur. Add Gaussian blur in Photoshop and soften the light.
Step 21. It’s Time to Soften the Light

Adjust the blur as shown in the day to night Photoshop sample. You can play with the amount of glow depending on your demands. If you are after atmospheric images, you should add more glow.
In case you want to mimic a misty night, go for higher values. If you need a crisper nighttime image, keep this value at lower levels.