

Reducing Photoshop file size is important, since large PSD files can hinder the software’s performance, lead to crashes, and take a lot of time to save. You can deal with that issue using different methods and following Photoshop tutorials that involve creating a white layer, applying layer masks, or flattening layers.
Add a White Layer in Photoshop to Shrink the File Size
If you hide most of the drawn elements behind a fully white layer, you’ll heavily unburden the preview feature, which can lead to a significant decrease in loading times. In my case, this method lowered the overall file size from 182MB to 165MB.

Prior to saving the PSD file, go to Layer > New Fill Layer > Solid Color… and create a white layer. A new window will appear, allowing you to assign a name to the layer.
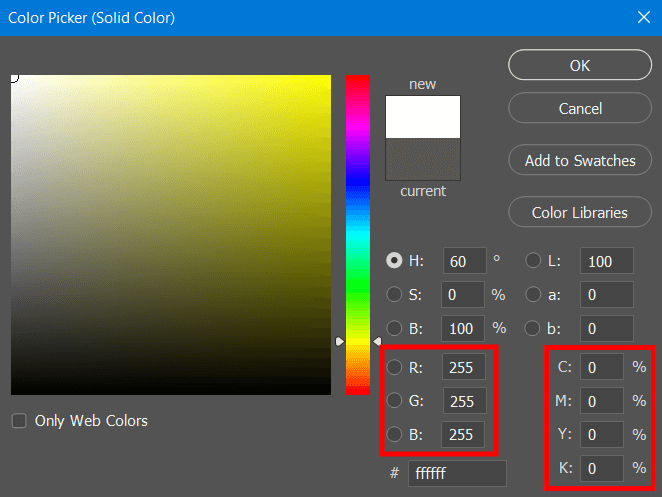
Click OK and you will be taken to another. Here you’ll have to select pure white as the fill color. Set the RGB value to R255 B255 G255 or the CYMK code to C0 Y0 M0 K0.

The new white layer will now be added to the Layers panel. If it wasn’t automatically applied as the top layer, click and drag it to the appropriate position in the menu.
Apply Layer Mask
You can apply a layer mask to reduce PSD file size but keep in mind that the layer mask effect can’t be edited after it was applied. The usage of a layer mask allowed me to cut down the image size from 182MB to 179MB.
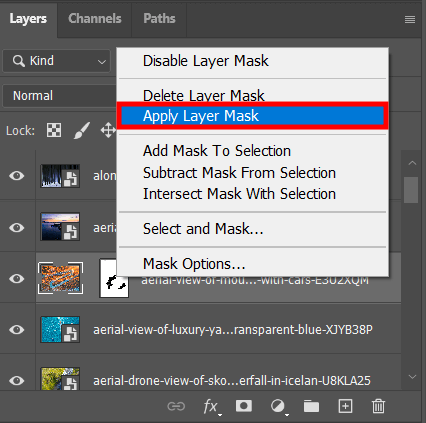
- To apply a mask in Photoshop, click the right mouse button on the layer and choose “Apply Layer Mask”.
- Masked layers are marked in the layer thumbnail image to help you distinguish them from regular layers.
Flatten Layers
A PSD file that contains 50 layers takes up a lot more space than one that only has 5 layers. The flattening method allowed me to bring down the file size from 182MB to just 22MB.

You can flatten the layers in Photoshop by clicking the right mouse button inside the Layers panel and picking “Flatten Image”.

If the project contains a hidden layer, you will be asked to choose whether it should be applied to the flattened image or not. If you don’t care about the hidden layers and want to remove them, then simply press “OK”.

Once this process is done, the file will only contain a single layer that was created by merging all the unhidden layers.
Hide All Layers
Using this method allowed me to reduce the file size from 182MB to 168MB.
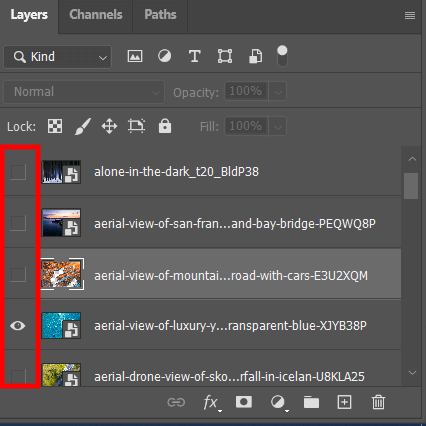
You can hide any layer by pressing the eye icon that can be found to the left of any layer in the Layers panel.
Delete Unused Layers
Getting rid of unused layers has lowered my file size from 182MB to 144MB.
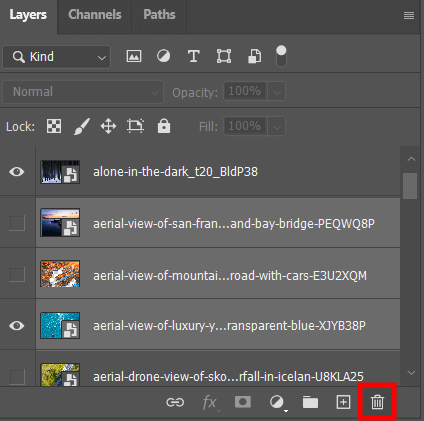
- You can delete a layer by dragging it to the bin symbol below the layer list and letting go of the mouse button once the cursor is hovering above the bin.
- It’s also possible to pick multiple layers by pressing and holding the Control (Windows) or Command (Mac) key while clicking on the desired layers and then dragging them to the bin in one go.
Rasterize Smart Objects
Photoshop lets you rasterize smart objects to decrease the overall image size but it’s worth mentioning that rasterized elements can’t be reverted to being smart objects. Employing this method helped me cut down the project size from 182MB to 114MB.
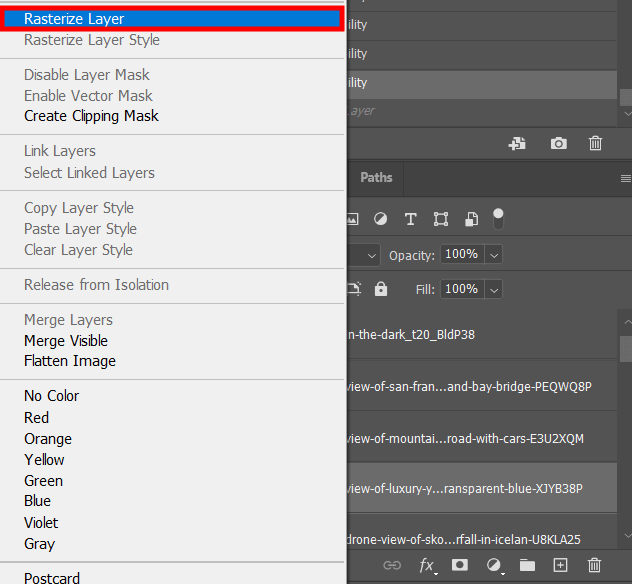
You can rasterize a smart object by right-clicking it in the Layers panel and choosing “Rasterize Layer”.
Change the Image Size and Resolution
Another popular method that allows you to reduce file size in Photoshop involves lowering the resolution of the image in question. That said, this solution isn’t applicable if you require an image of a specific size for printing.
By altering the size and resolution of my project, I managed to reduce the file size from 182MB to just 87MB.

You can adjust the resolution by going to Image > Image Size or employing the Alt + Control + I (Windows) or Option + Command + I (Mac) hotkey combination.

Lower the file size by lowering the pixel width and height values. You can also consider dropping the resolution to 72 Pixels/Inch for images that will only be used digitally.
Delete Alpha Channels and Paths
Alpha channels are an extremely handy Photoshop feature that enables you to save selections that can be re-edited or used later. Paths are another handy addition included in Photoshop that allows you to deep etch an image in another program or can be used for making selections with the help of the created anchor points.
Once I removed the alpha channels, the file size dropped from 182MB to 175MB. Deleting the path layers helped me further decrease the size to 172MB.

Go to the Channels section, which is directly adjacent to the Layers panel. Now, click and hold the mouse cursor on the alpha channel while moving the cursor to the bin symbol below.

You can find the Paths panel right next to the Channels section. Once again, click the left mouse button and drag the cursor over the bin symbol to delete the path.
Use Adjustment Layers
Rather than creating a duplicate of a layer and changing its brightness, saturation, or other similar parameters, Photoshop lets you add a special layer that takes up far less space while achieving the same results. After simply deleting the duplicate layer, my file size dropped from 182MB to 170MB.

To take advantage of this feature, go to Layer > New Adjustment Layer and pick the desired adjustment type. If you’re unhappy with the result, you can undo and redo in Photoshop until you’re satisfied with the final image.

Once you’ve picked an adjustment, it will be added to the Layers list as an individual layer, which can later be edited as you see fit.
Save the File in TIFF Format
Saving a PSD file in TIFF format is a great way of reducing its size. Just remember to ZIP it during the saving process. If you do so, the TIFF file can be later opened in Adobe PS while preserving all of its editable layers and filters.
By saving my Photoshop image as a TIFF file, I lowered its size from 182MB to 126MB.
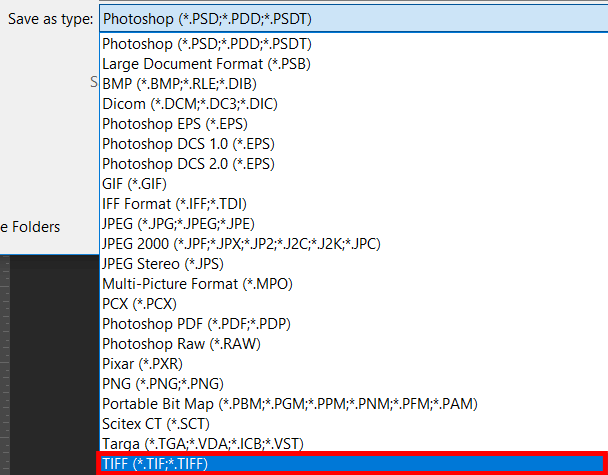
To save an image in TIFF format go to File > Save As or employ the Photoshop keyboard shortcuts Shift + Control + S (Windows) or Shift + Command + S (Mac).
Once you see the Save window, expand the list next to “Save as type:” and pick TIFF (*.TIF,*.TIFF). Now press “Save” in the lower right corner of the window.

You’ll be greeted with another window that presents different parameters for you to tinker with. Be sure to enable ZIP under Image Compression and Layer Compression. This format has longer saving times but ends up taking less space than a PSD project.