

If you, like me, are tired of the same type of photos in the form of a square and a rectangle and want something new for your content, then in this tutorial I will teach you how to crop image in circle shape in Photoshop while maintaining a transparent background. Such images look good on social media pages and as any other design components.
STEP 1. Open Your Image in Photoshop

To get started, open the photo you want to crop in Adobe Photoshop. This can be done by clicking Open at the bottom of the screen or by pressing the Ctrl + O hotkeys.
STEP 2. Unlock the Background Layer
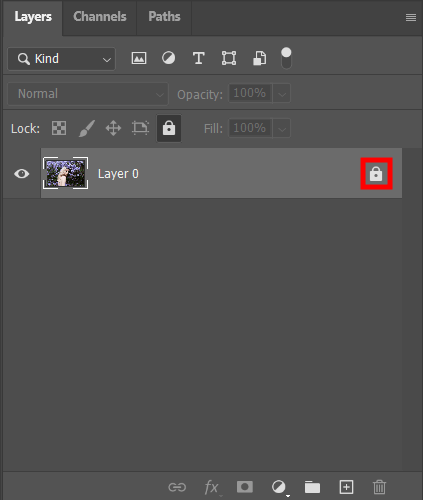
When you open the image, you will see it as the Background layer in the Layers panel. First of all, convert it to a normal layer to make a crop circle in Photoshop. This needs to be done because the background layer cannot be transparent, and we need transparency around our future circle.
Just click on the lock on your background layer. Alternatively, you can do it holding down the Alt/Option key and double-clicking on the Background layer.
STEP 3. Select the Elliptical Marquee Tool
As a rule, everyone is used to clicking the Crop Tool to crop an image in Photoshop. However, in our case, this is not suitable, and we will act differently.
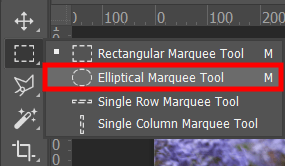
Find the Elliptical Marquee Tool in the toolbar. If you’re using the default settings, you might not find it right away, as it’s hiding behind the Rectangular Marquee Tool. Once found, Right-click/Control-click on the Rectangular Marquee Tool. A menu will appear in front of you, in which you should select the Elliptical Marquee Tool.
STEP 4. Draw a Circular Selection Outline

Next, you need to make an elliptical shape selection by clicking on the photo. Don’t worry if your circle is jagged – just press Shift while dragging and you’ll see a perfectly shaped circle.
At the end of this step, release the mouse button and then press the Shift key. Everything must be done in this sequence because otherwise, your selection outline will return to the shape of a hand-drawn circle.
STEP 5. Invert the Selection

Now you need to invert the selection, as you will be cropping your photo, and what you want to crop is around the circle, not the circle itself. To do this, find the Select menu in the menu bar and choose the Select Inverse function there.
STEP 6. Delete the Image Outside the Circle
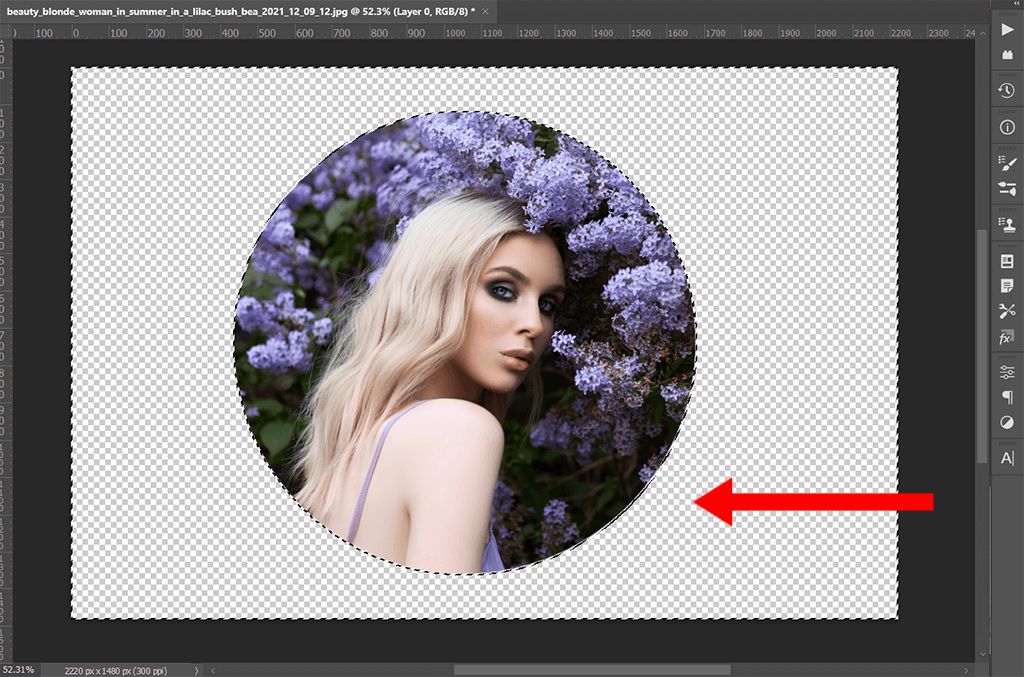
After you’ve inverted the selection, press Backspace/Delete on your keyboard to delete everything around your circle. Now this area is transparent and checkered – this is how Photoshop determines transparency.
Next, you need to crop this transparency as well. Go to the Image menu and find the Trim option there. A dialog box of the same name will appear in front of you, in which you need to select the Transparent Pixels option. Done! Now you know how easy it’s to crop photo in circle shape in Photoshop.
STEP 7. Save the Image as PNG
