
Such operation as grouping layers in Photoshop is rather popular among users, so every photographer/retoucher, especially a beginner one, should clearly understand how to achieve a successful result. Layers can be grouped by using commands of the main and context menu. However, you can speed up the process by using hotkey combinations. Here are several simple ways to group layers quickly.
METHOD 1. Go to the Layers Panel
Knowing how to group layers in Photoshop, you can easily order and access connected layers. For example, when editing a portrait, it is helpful to group connected corrections, e.g., hair & skin retouching, into separate groups, instead of cramming them into one pile. This way you will segment your layers and optimize the working process. Go to the Layers Panel to start working.

Launch Photoshop and open your document. On the layers panel, choose the “Window” > “Layers” tab to open the “Layers” panel. Note that each layer reflects the thumbnail view specifying the type of content on the layer. You can also use layering photo apps to cope with the task, using your smartphone.
If you lack skilled to add effects to your photos or you need professional help with more complex manipulations, you can contact the FixThePhoto experts. They will easily implement your ideas with minimum time and at an affordable cost.
METHOD 2. Create a New Layer Group
Even if you know how to merge layers in Photoshop, you also understand that this operation is not a standalone method of grouping layers. This technique is fitted when you work with a complex document that has a great number of layers, and you have to group a wide array of specific layers.
STEP 1. Create a “New Group”

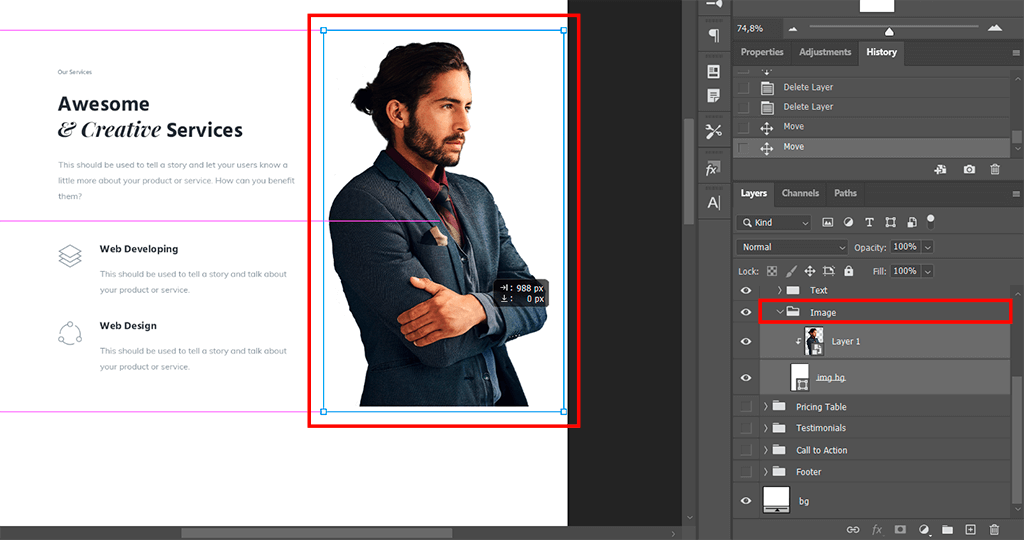
Click on the layer with an image. Hold down Shift and click on the Img bg layer to select both layers. Click on the “Group from Layers” at the bottom of the “Layers” panel.
STEP 2. Change the Name of the “New Group”
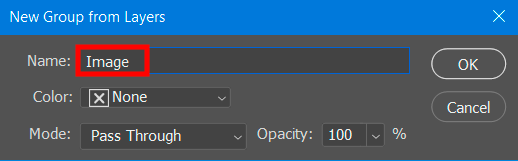
Double-click on the name of the new group and change it into “Image”. Click on the arrow near the “Image” layer group to see how layers are arranged into a group.
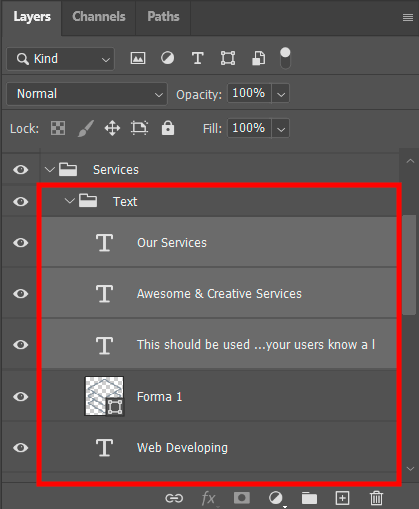
STEP 3. Select Layers with Text

Select layers with text and click on the “Create Group from Layers” menu item. This way you will group layers in Photoshop.
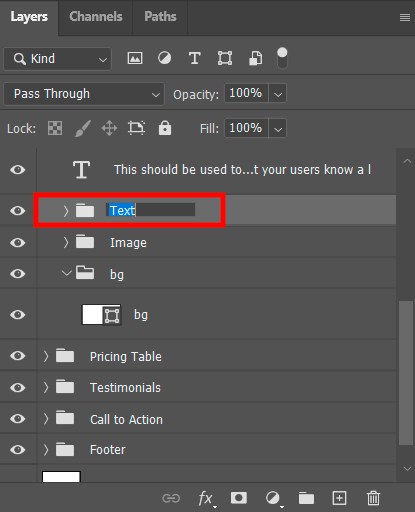
Double-click on the group to change its name.
STEP 4. Work with the Rest of Layers

Hold down the “Shift” button and click on the other text layers in the document.
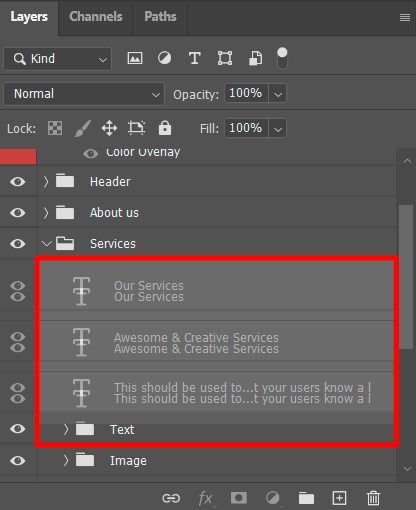
Next, drag the chosen layers to the new group, holding down the left mouse button.
Open the group to make sure the text layers are in one group.
STEP 5. Return to the Tool Panel

Choose the “Move” tool from the list and make sure the “Auto-Select” checkbox is selected.

Click on the “Image” group on the “Layers” panel. Move the photo from one side of a poster to another. Now you know how to group layers in Photoshop and can watch other Photoshop tutorials on YouTube.