

Have you been wondering how to create a halftone pattern Photoshop? Below, I will briefly describe the two main methods you may use to achieve this effect and enhance your photo.
Method 1. Auto Filter Option
When using this method, you need to utilize the in-built tools available in Photoshop. It will allow you to quickly achieve the desired halftone effect with gradient filling.
STEP 1. Turn Your Photo Black and White
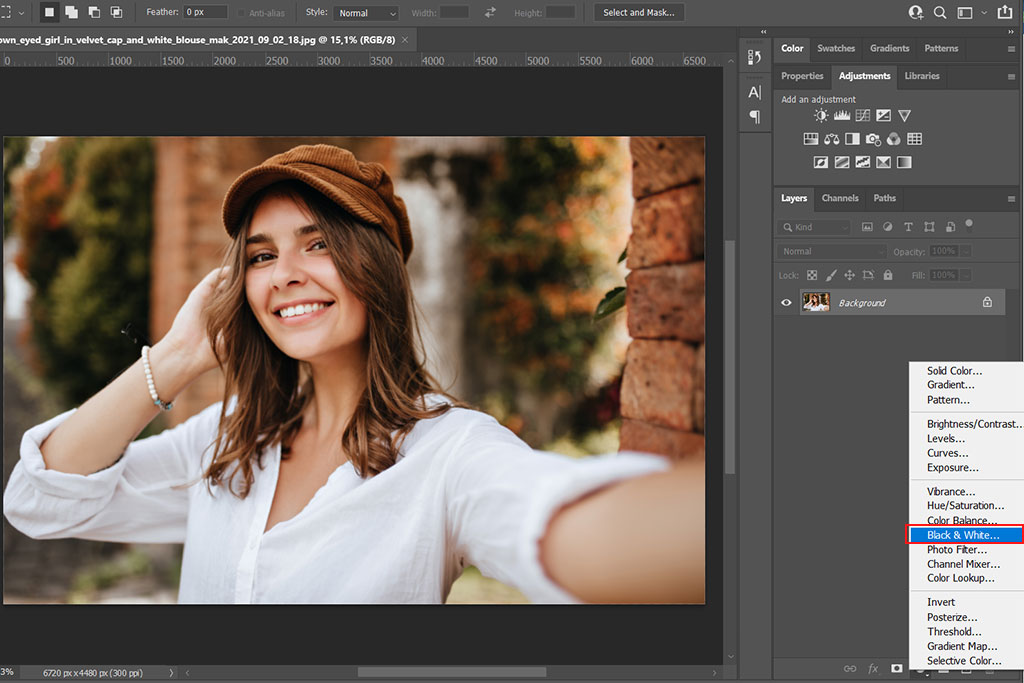
Open a photo by dragging and dropping it onto the canvas. Alternatively, you can click on the Open file option on the homepage. Then, select Black and White in the Adjustments menu.
STEP 2. Apply the Color Halftone Filter

Find the Pixelate option in the Filter menu. Then, select Color Halftone in the drop-down menu. Before doing it, make sure to crop image in Photoshop. It will help you improve the composition of the final photo.
STEP 3. Adjust the Settings of the Filter
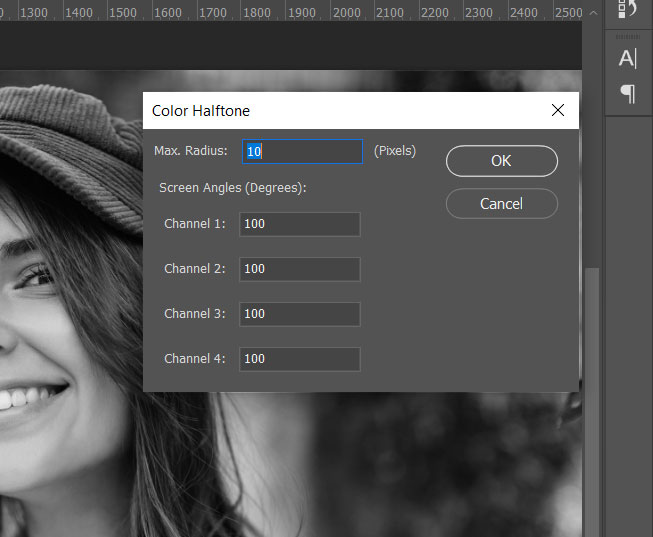
To achieve the same result as in the example, set the maximum radius to 10 pixels. It will allow you to get an image with a halftone effect Photoshop where every detail is clearly visible.
STEP 4. Create a Gradient Layer

If you want to make your photo more beautiful by improving its saturation, try adding a gradient to it. To do it, click on the New adjustment layer button at the bottom of the Layers panel and select the Gradient option in the drop-down menu. Rename your layer to avoid possible confusion. You need to perform this task to be able to edit your photo without affecting the source image.
STEP 5. Customize the Gradient to Your Liking
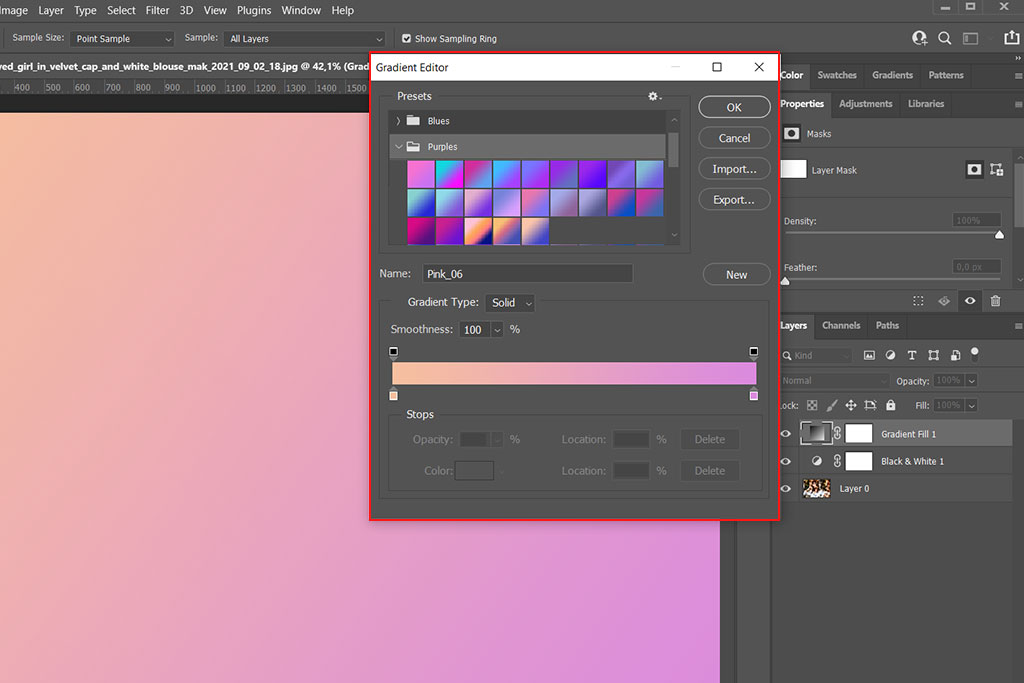
When it comes to choosing the gradient color, there are no fixed rules. Everything depends on your preferences and needs. Try to select soft pastel colors to get a stylish picture.
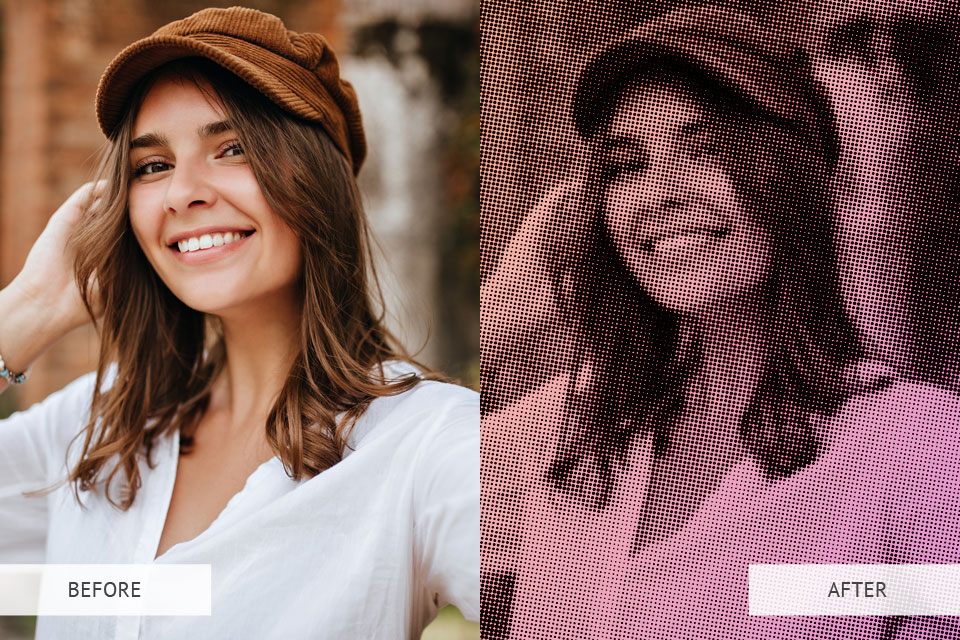
STEP 6. Select the Blend Mode

If you are fully satisfied with the settings, select Blend mode to see the final result. Linear Burn will allow you to achieve a result that is close to reality. Besides, the halftones in your photo will look soft. You can experiment with brightness and saturation.
STEP 7. Done
When everything is ready, you will be pleased to see the result. If these manipulations are too difficult for you, you can outsource this task to professionals. They will help you quickly and efficiently perform various manipulations with your photos and apply the halftone effect to them. They can also create a custom halftone pattern for your photo.
Method 2. Manual Pattern Creation
You can also use a more complex approach and create a halftone pattern from scratch. This method allows you to customize the effect that you want to achieve to your liking.
STEP 1. Create a New Document
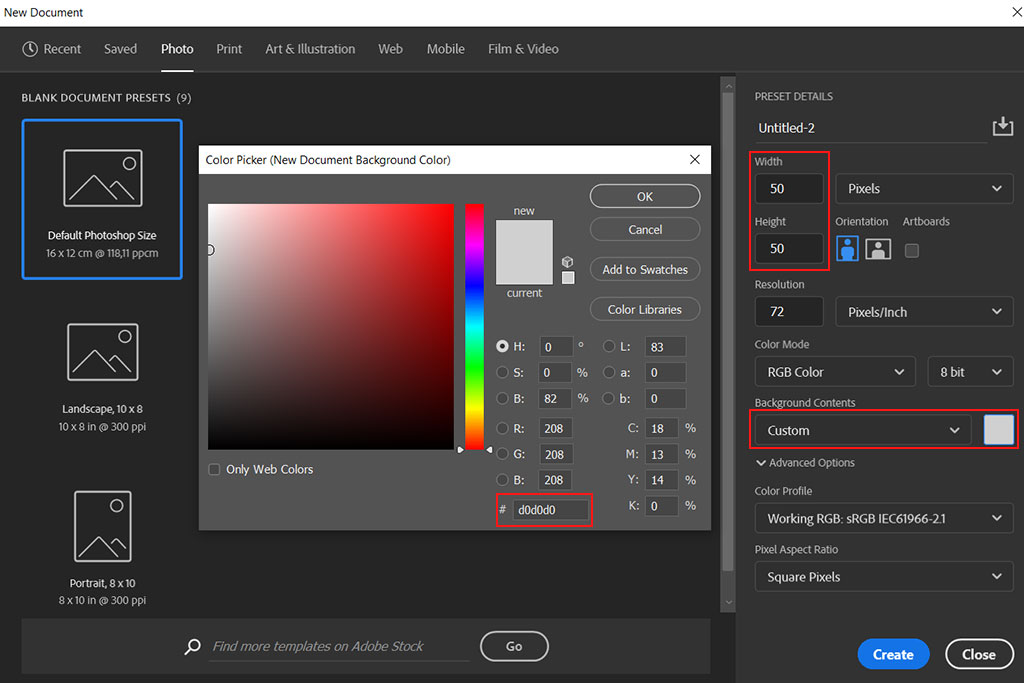
Create a new document in Photoshop. Set its size to 50х50 to make it easier for you to work with your gradient afterward. Then, select the Custom option in the background contents field.
STEP 2. Draw a Rectangle
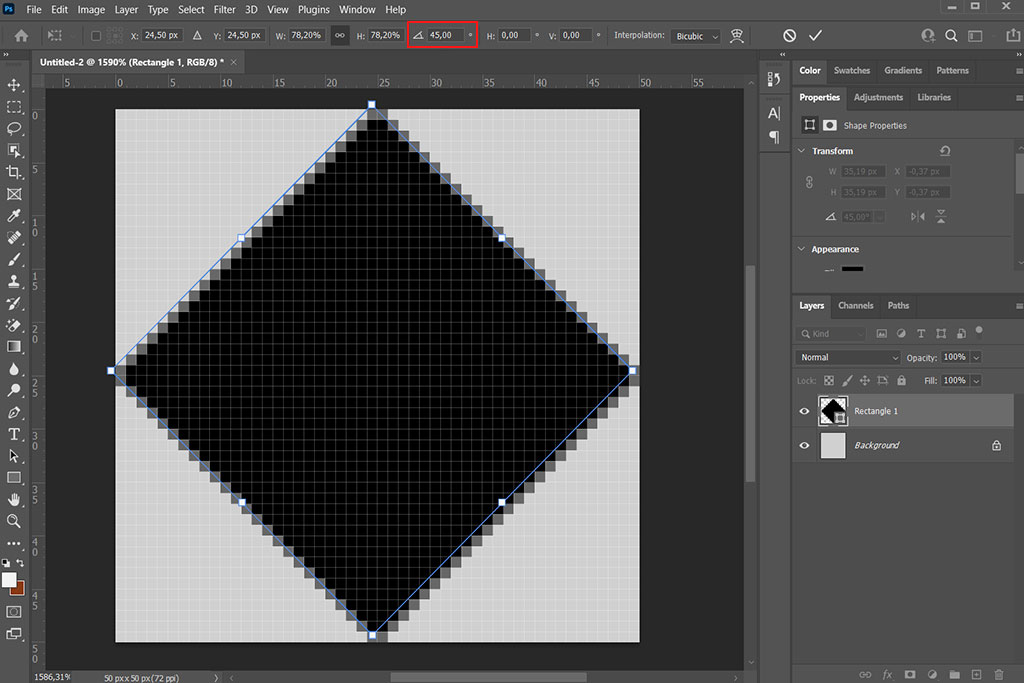
Create a new layer and draw a rectangle on it with a size that equals the size of the canvas. Then, rotate it to get a diamond shape. You can do it by clicking on the corresponding button or setting the angle manually.
STEP 3. Overlay a Gradient
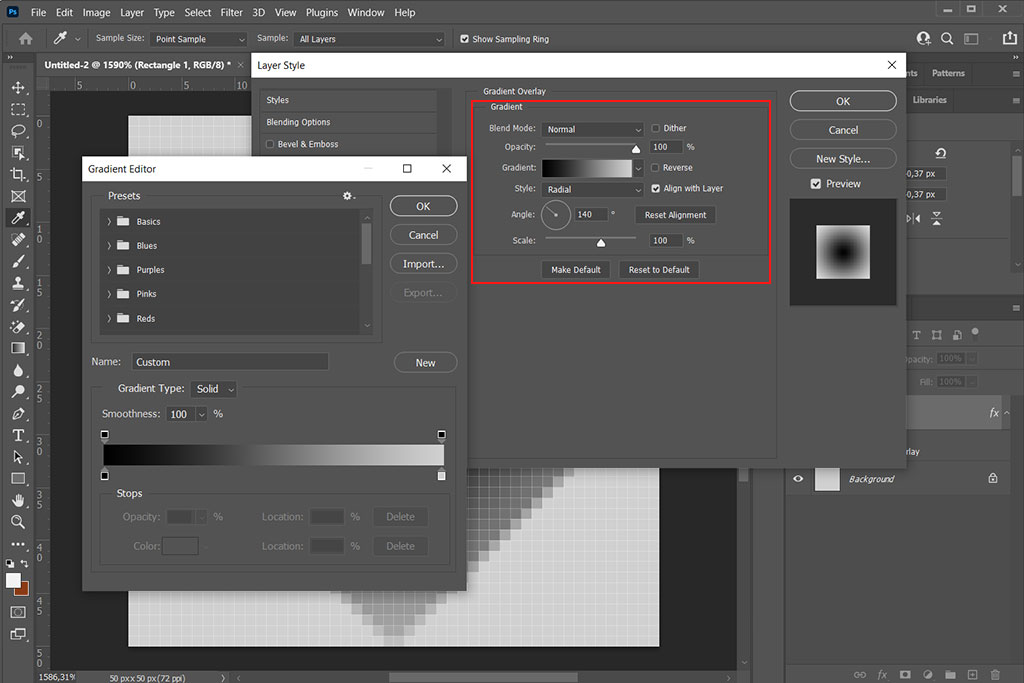
In the Layer menu, click on the Layer Style option and choose Gradient Overlay. Before doing this, you need to select the Foreground to Background gradient. The Foreground value should be #000000 while the Background value should be #d0d0d0. Use the same settings as in the example.
STEP 4. Make a Stamp of the Visible Layers
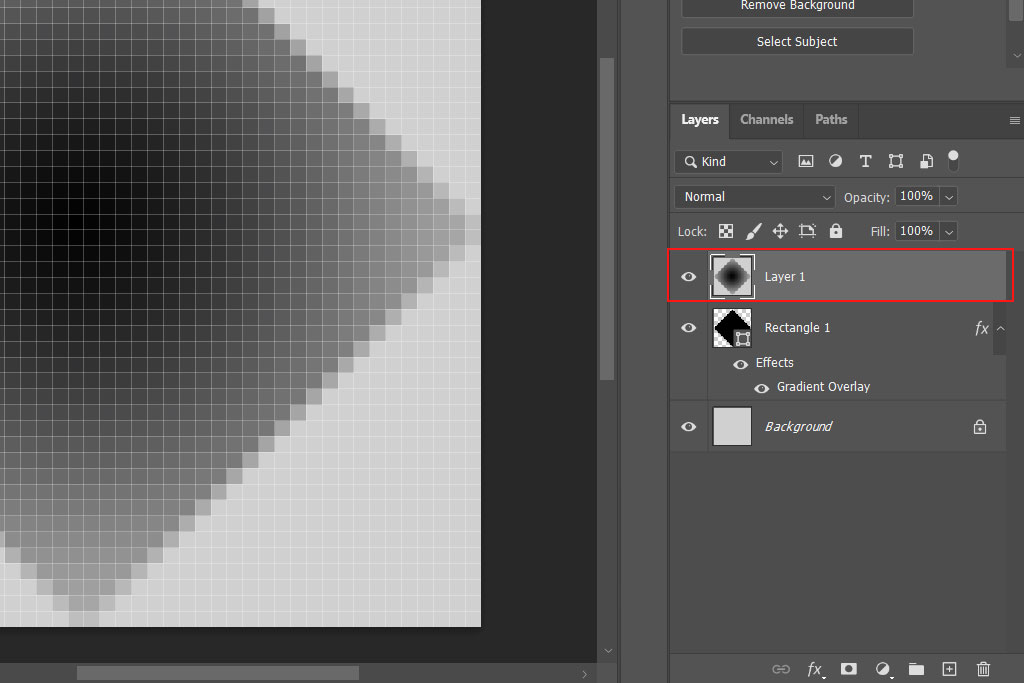
If you don’t want to spend a lot of time on post-processing, use Photoshop keyboard shortcuts. To create a stamp using your visible layers, use the Ctrl+Shift+Alt+E key combination.
STEP 5. Apply the Offset Filter

First, open the Filter menu, then, click Other > Offset. Use the same settings that I used in the example and confirm the changes by clicking OK.

Set the Horizontal value to +25 and the Vertical value to 25. Then, select the Wrap Around option in the Undefined Areas field. It will allow you to create a halftone filter Photoshop with little to no effort.
STEP 6. Drag the Layer with the Rectangle to the Top

Drag and drop the layer containing a rectangle with a gradient effect applied to it. Put it on top of all the other layers. You can also achieve the same result if you go to the Layer menu, click on Arrange and select Bring to Front.
STEP 7. Create a Pattern
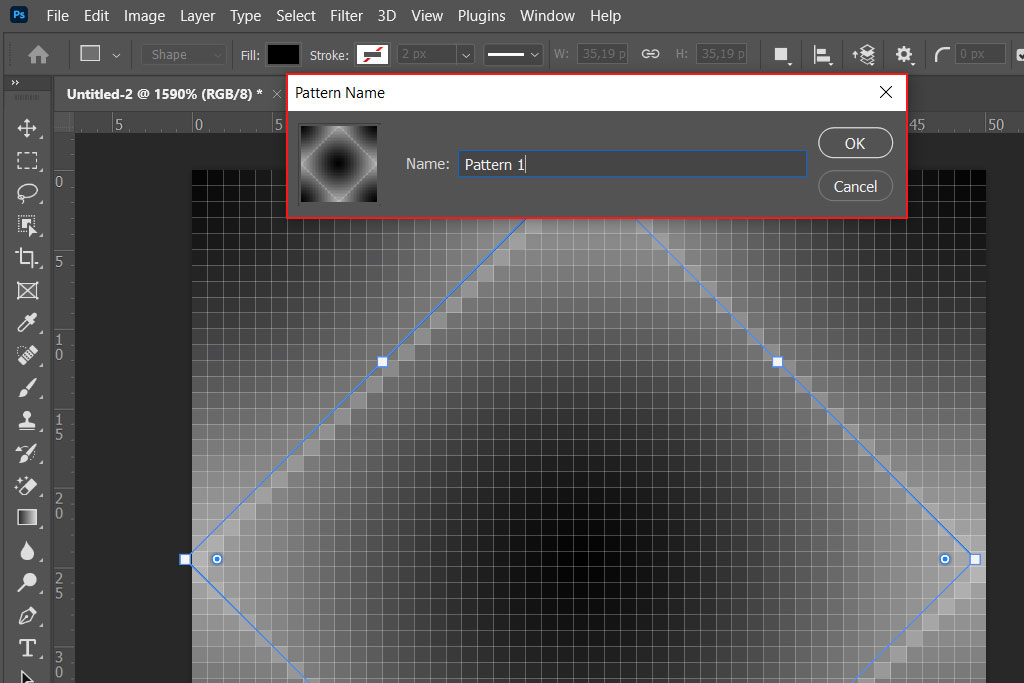
All the steps above are necessary for those who want to make a pattern in Photoshop and add it to their library. Open the Select menu, click All and then choose Edit to define your pattern. You can rename it and then save the changes. Select a name that will make it clear that it’s a newly-created pattern.
STEP 8. Add Gaussian Blur to Your Photo
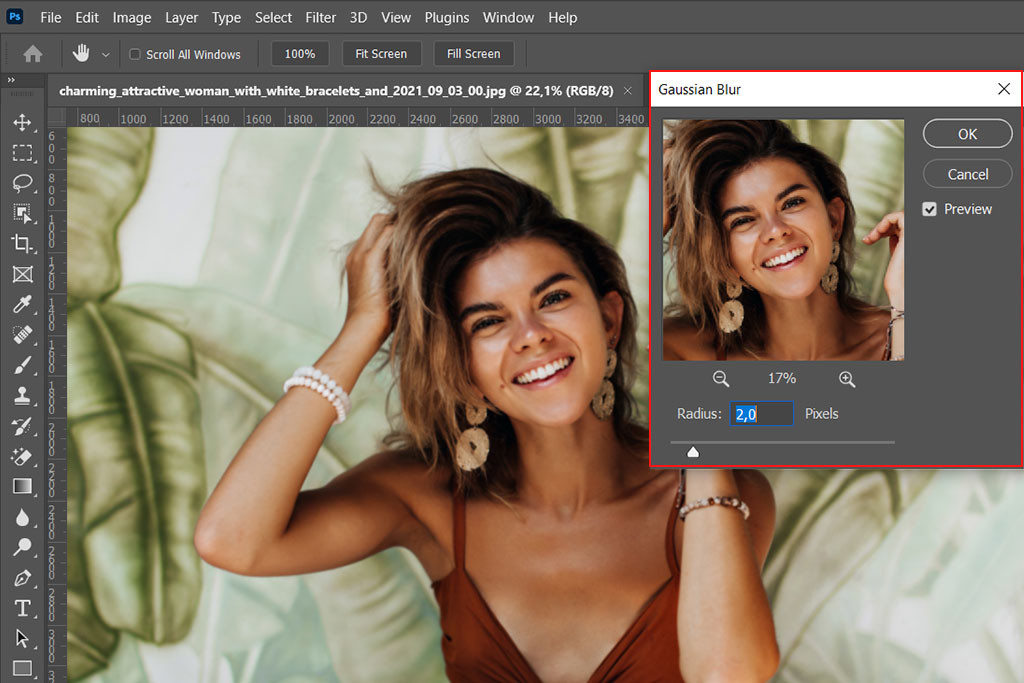
Open the photo that you want to enhance in a new tab. Make sure to remove objects in Photoshop to make your photo look clean and improve its composition.
Go to Filter > Blur > Gaussian Blur. Use the same settings that you see in the example and confirm your edits. This effect will make the halftone shapes look rounded and blur the edges. Thanks to it, your photo won’t have a noticeable grunge effect.
STEP 9. Turn Your Photo Black and White

Open the Layer menu and find the New Adjustment Layer option. Click on it to adjust the hue and saturation. In the corresponding panel, set the Saturation value to -100. It will allow you to achieve a smooth black-and-white effect with soft shadows and well-balanced highlights.
STEP 10. Create New Fill Layer

In the Layers menu, create a new Fill layer. Select the Pattern option from the drop-down menu.
STEP 11. Set up Your Pattern

Find the pattern thumbnail and click on it. Then, when the drop-down menu opens, select the Photoshop halftone pattern that you have created. It’s better to set Angle to 10 and set Scale to 50. After doing it, click OK to confirm your settings. You can also use custom settings to achieve a different effect.
STEP 12. Choose Preferable Blend Mode

The final step allows you to actually see the result. You need to set the blend mode of the layer containing the pattern to Hard Mix and adjust the Fill value by setting it to 90%.
STEP 13. Enjoy the Results

Now when everything is done, you can enjoy the result. You can also follow these steps again to enhance any other photo as you already have your own halftone pattern Photoshop ready.